Unlocking a Project (Read-Only Mode)
After creating a project, the system automatically locks it. This means the project enters a read-only mode, where no further modifications are allowed. This prevents unintentional changes because the Code Editor updates in real time as you make adjustments.
In scenarios where multiple applications are loaded simultaneously, it is easy to accidentally modify the contents of a node without realizing it. Such inadvertent changes could generate erroneous code, which can be challenging to trace back and troubleshoot.
This locking mechanism serves as a safeguard, ensuring the integrity of the project’s code. For most users, the project should remain locked unless they have a deep understanding of the underlying code structure and know exactly what they are doing. Only experienced users should attempt to modify the project after it has been locked, as they are better equipped to handle the potential risks of making changes in a real-time environment. This approach helps avoid errors and ensures the generated code remains accurate and functional.
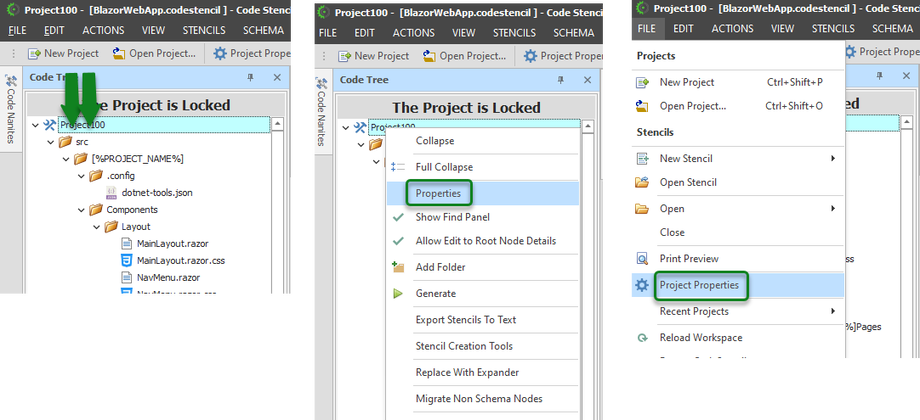
A locked project will display like this:
To unlock a project:
- Double-click on the root node, OR rt-click on the root node and select Properties, OR File | Project Properties
- Expand the Properties tab on the right side of the form; Uncheck “Locked.”
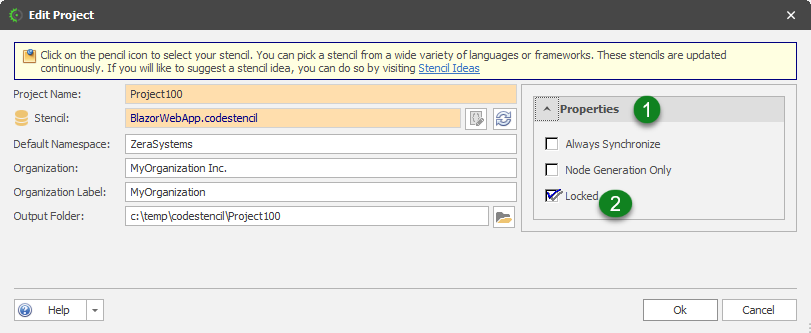
- Click OK to Save.

