The Quick Table and Column Updates
The Quick Table and Column Updates form presents the user with a quicker way to update tables and columns than using the traditional schema dictionary panel.
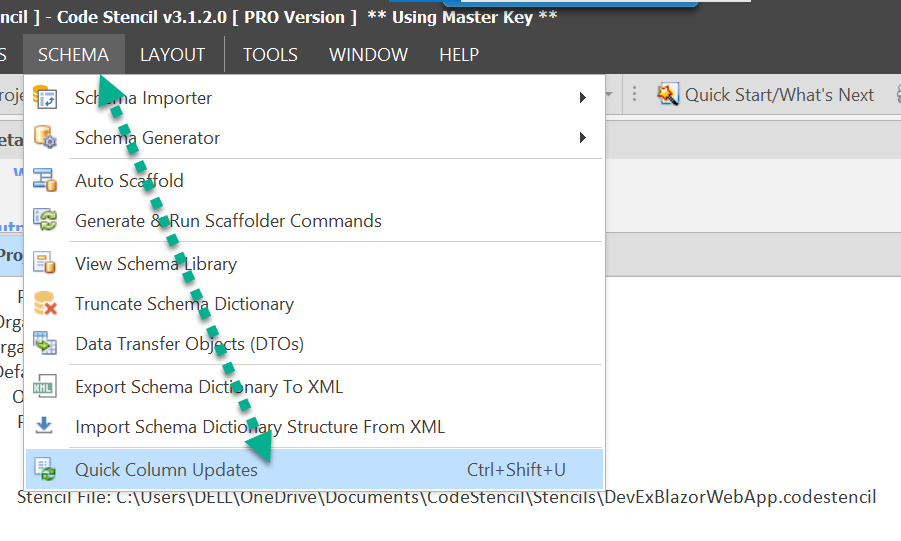
NOTE: Please note that there are three ways to trigger the Quick Table and Column Updates;
- Using HotKey: Press
Ctrl + Shift + U. - Using Schema Menu: Refer to the image below for visual guidance.
- During Project Generation: This will automatically trigger the Quick Table and Column Update. This is what will be discussed in this guide.
1. Quick Table Update Prompt:
After creating your project, a dialog window will prompt: Do you want to load the Quick Update form? (Y/N) You can choose either Yes or No. This dialog offers the option to perform a Quick Table and Column Update. Here's how it works:
- Prompt: A dialog box just like the image above, will ask if you wish to proceed with the
Quick Table and Column Update. - Options: You have the choice to select either
YesorNo.
- No: Choosing
Nowill let you proceed with the project creation process. - Yes: Selecting
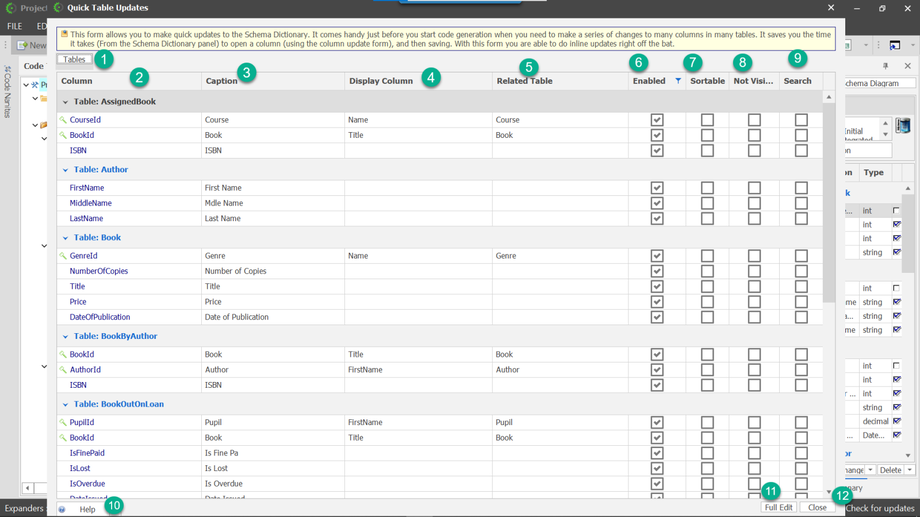
Yeswill trigger theQuick Table Updatewindow which will look like the image below.
- No: Choosing
2. Quick Table Update Window:
Below are the properties in the Quick Column Updates window;
- Tables: You can get information about the tables by clicking here.
- Column: These are the column names for each table.
- Caption: This is the humanized name for each field.
- Display Column: The function of the displayed column is to provide meaningful information from the related table. Instead of showing just the foreign key value (an ID or a code), this presents user-friendly information associated with that foreign key value.
- Related Table: This column displays the table's name referenced by the foreign key.
- Enabled: The column will be involved in every code generation process.
- Sortable: This provides the option of sorting the column in either ascending or descending order.
- Not Visible: [TODO]
- Search: This ensures that the column can be looked up.
- Full Edit: The documentation can provide more details about this process.
- Close: This will close the window. Also, note that changes made are automatically saved before closing the window.


