New Project (2 of 2) - Project Details
Coming from New Project (1 of 2) this is what you see:
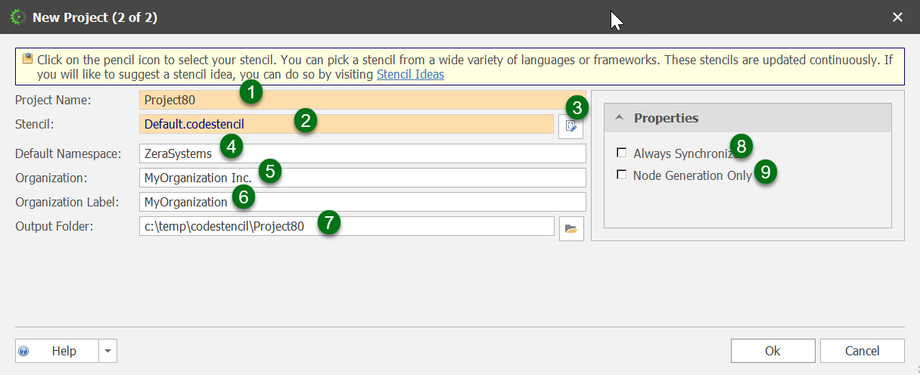
You can specify the properties of your project here.
- Project Name - This is the name of the project. It is read-only and was created in the previous form.
- Stencil - This is the name of the stencil used in this project.
- Stencil Selection - This button allows you to select another stencil.
- Default Namespace - This will be the namespace used in the project. For non-.NET projects ( for example javascript-based projects), the entry here would not make any difference.
- Organization - This is the name of your organization.
- Organization Label - This is the label your organization uses.
- Output Folder - This is the folder your code is generated into.
- Always Synchronize - This allows you to synchronize updates to the stencil.
- Node generation Only - This means that this project
NOTE: The ORGANIZATION LABEL cannot cannot contain a whitespace (extra space).
Selecting Another Stencil
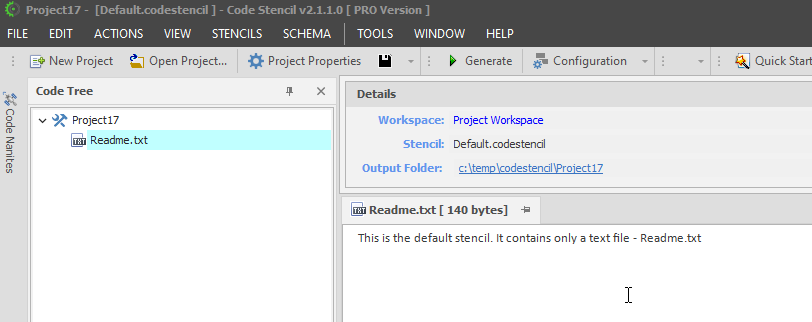
By default, the "Default.codestencil" stencil is automatically selected once the "New Project (2 of 2)" form is loaded. This consists of just a readme.txt file:
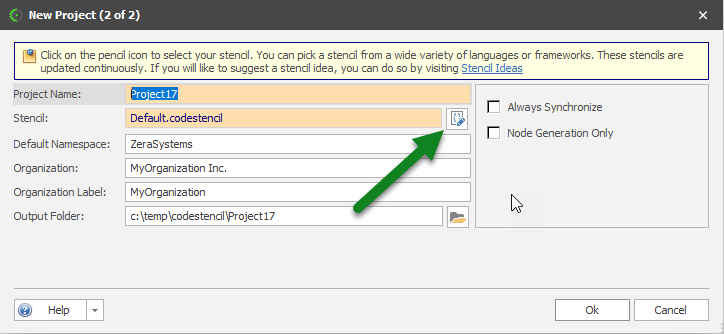
You can however switch to a different stencil by clicking on the pencil icon ( See 3 above).
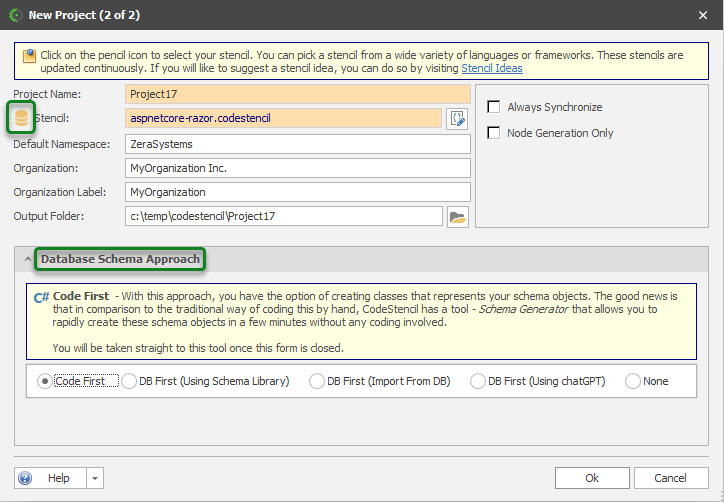
We will go ahead and select the aspnetcore-razor stencil which will give us CRUD capabilities. See Selecting Stencils for the complete description.
After selecting the stencil, this is what you see:
Notice a database icon next to the Stencil prompt (See 2 above). This simply means that the selected stencil depends on a schema, meaning it can generate CRUD-related features. As a result the "Database Schema Approach " tab/section automatically becomes visible.


